
I bought a snack sleeve pattern awhile back so I decided to try it out. The pattern was OK but I was not 100% satisfied with it(I did not like their sizing nor did I like the position of the Velcro and I wanted a bit more stability) so I tweaked the pattern a bit and this is what I came up with.
Supplies:

1/2 yard fabric of your choice ( I used muslin(unbleached cotton))
1/2 yard rip stop nylon(or similar nylon will work just fine)
scrap fabrics
fusible interfacing
scissors
rotary cutter and mat
Velcro ( cut in 6 in. strips)
Step 1:
trim up your fabric and cut into one long 8.5 inch wide strip.
for snack bags cut the length 9"
for sandwich bag length cut 12"
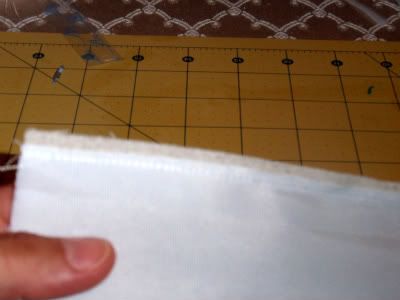
Step 2:
line right sides together and sew the tops(the 8.5" sides)
Step 3:
trim the nylon down almost to the seam and turn right side out.
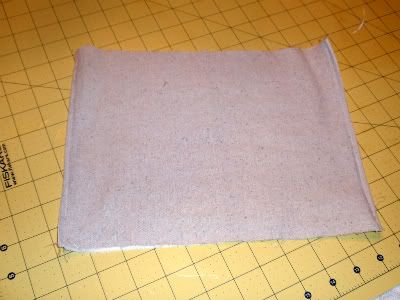
Step 4:
press the seams and sew across the top again about 1/8" from the top.
***NOTE***This is a step I tweaked for stability. You don't have to do it but in my opinion it helps keep the seam trim and stable.
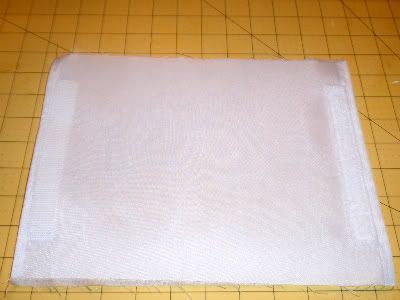
Step 5:
Center your 6" Velcro strips about 1/4" down from the seams and sew them on. You can either stitch them to both the nylon and the outer fabric or to just the nylon. Stitching to just the nylon gives the bag a cleaner look and hides any bunched up thread from sewing the hook strip of Velcro and it also hides no-so-straight sewing lines.
Step 6:
Sew up the sides together using a french seam.
Keeping the bag right side out, pin and sew closed with a 1/4" inseam.
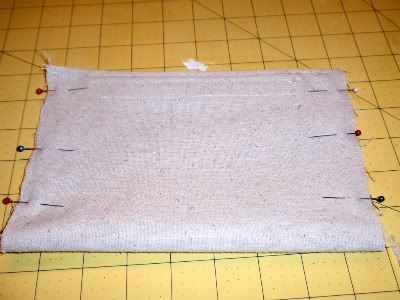
Just like in step 3, trim nylon and fabric down to just above the seam. This helps keep the sides trim.
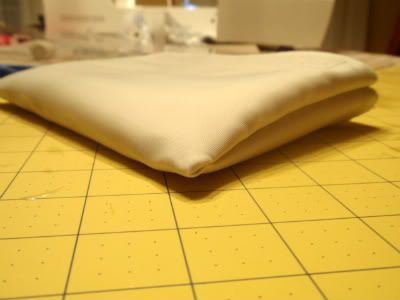
Turn inside out and sew up the sides again using a 1/4" inseam. Make sure to use a pencil or pen or something to push the corners of the bag all the way out so that they looks like this
Step 7:
Turn right side out, trim off all strings, and you are done!
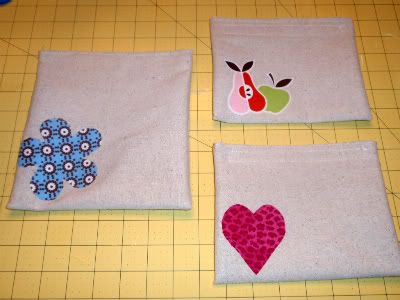
If you want to add an applique like I did follow this applique tutorial over at Lil Blue Boo. Ashley has some great tutorials.
Once you have the pattern down you whip these in about 15 mins. each. Isabela uses them for her lunch every day and LOVES them. The pink cheetah print heart one is her favorite :)
Step 1:
trim up your fabric and cut into one long 8.5 inch wide strip.
for snack bags cut the length 9"
for sandwich bag length cut 12"
Step 2:
line right sides together and sew the tops(the 8.5" sides)
Step 3:
trim the nylon down almost to the seam and turn right side out.

press the seams and sew across the top again about 1/8" from the top.
***NOTE***This is a step I tweaked for stability. You don't have to do it but in my opinion it helps keep the seam trim and stable.

Step 5:
Center your 6" Velcro strips about 1/4" down from the seams and sew them on. You can either stitch them to both the nylon and the outer fabric or to just the nylon. Stitching to just the nylon gives the bag a cleaner look and hides any bunched up thread from sewing the hook strip of Velcro and it also hides no-so-straight sewing lines.

Step 6:
Sew up the sides together using a french seam.
Keeping the bag right side out, pin and sew closed with a 1/4" inseam.

Just like in step 3, trim nylon and fabric down to just above the seam. This helps keep the sides trim.
Turn inside out and sew up the sides again using a 1/4" inseam. Make sure to use a pencil or pen or something to push the corners of the bag all the way out so that they looks like this

Step 7:
Turn right side out, trim off all strings, and you are done!

If you want to add an applique like I did follow this applique tutorial over at Lil Blue Boo. Ashley has some great tutorials.
Once you have the pattern down you whip these in about 15 mins. each. Isabela uses them for her lunch every day and LOVES them. The pink cheetah print heart one is her favorite :)
1 comment:
These turned out so great! Wonderful tutorial; this could be a great rainy day project with scrap material!
Post a Comment